October 9, 2009
 Main Door Too Tall but Okay
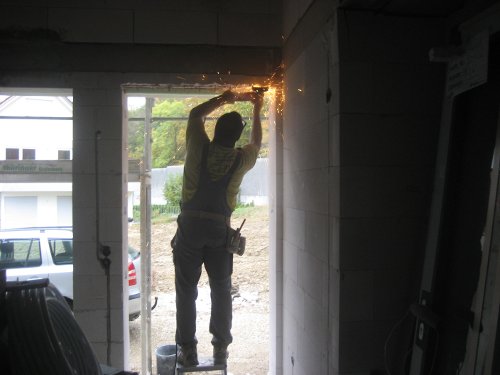
Our block work was to plan but the delivered door was too tall. With your Hilti, a decent angle grinder and a little time you can remove some of the header. You'll naturally want to move the matching window up so that header will also need to be cut our. Just above the headers are a concrete and steel band so static or loading issues are not a concern I was told. I did not have to remove all the reinforcing steel in the header so I also have no worries about the changes.
Our tall entrance door now looks great so if you have a tall stair well and high outside wall you may want Aktiv Bausatzhaus Südbaden GmbH to make this mistake on your house. Better would be just to plan for it from the start ;-).
February 18, 2010
 Instructions for Door Assembly
Included with your "Do it Yourself House" are a few visits from trades people to demonstrate some aspects of building techniques. The individuals we met were all pleasant and informative. Ask them questions as they are people that do this work on a regular basis and they see many more different situations than you might.
I was shown only the first steps of assembling inside doors. Upon starting the assembly we found that the frames did not fit the wall thickness we had. We wasted some time investigating this problem because Aktiv has been building for some time with only 2 thicknesses of inside block (according to the carpenter). I was not shown but told how to use insulating foam to secure the door frames and was given no instruction about the door handle hardware.
When the correct frames were delivered I managed with the instructions that came from the door manufacturer and our half demo to install the doors. As I am not sure if my method was the best please inform yourself and do not sign the carpenters paper stating the demo was finished until you are satisfied. Yes, my mother told me I am just too nice sometimes.
The next picture will show you my biggest mistake with the doors and what I still must change on some doors.
 Please be aware!
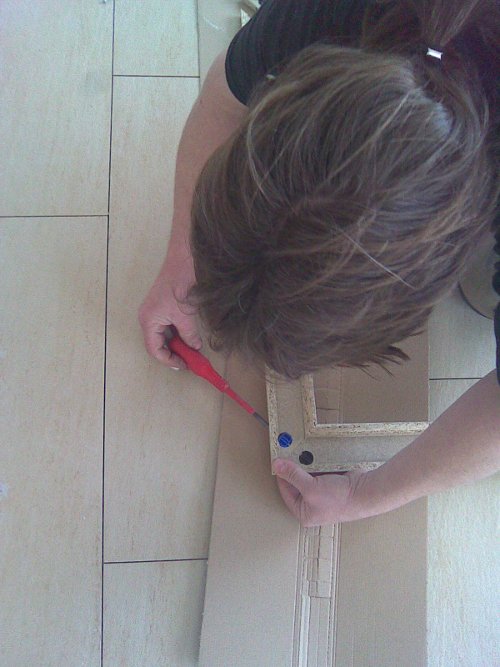
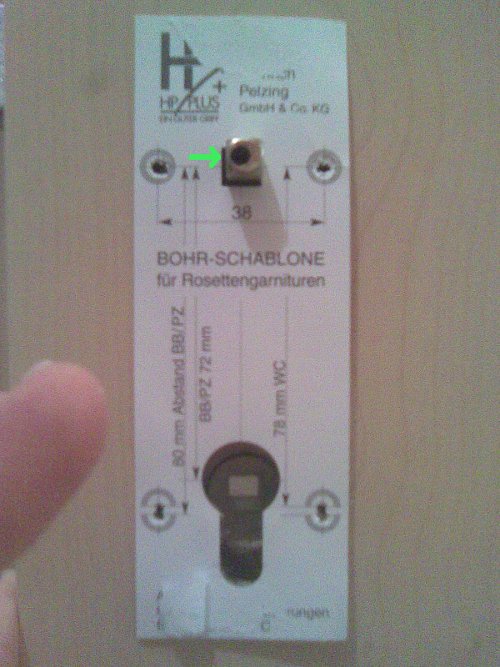
The installing of the handle hardware is really quite simple. Insert the square bolt for the handle and position the template evenly in the cut out hole. Using a punch mark the appropriate locations for the four holes you must drill. Do not drill through the complete door! You will repeat this process from the other side of the door. In our case the doors were hollow so the holes are no problem to match up.
What I was not aware of until mounting the last doors is what the green arrow shows. The square bolts have a hole in the middle and this hole is much closer to one edge of the bolt than the others. When it comes time to secure the handle of the door the set screws have a small point on them. When you tighten the set screw it will break through the thin metal of the bolt making a very secure mechanical connection. You will notice that when properly fitted the set screw will recess itself in the handle.
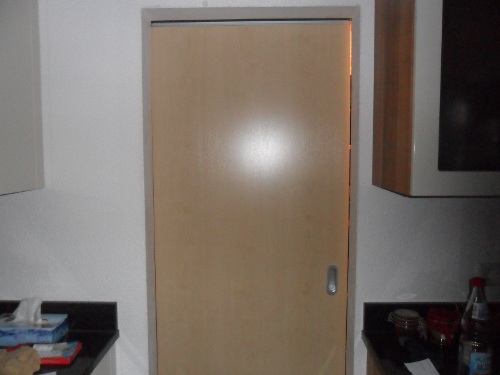
 Glass Door delivered with Two Holes
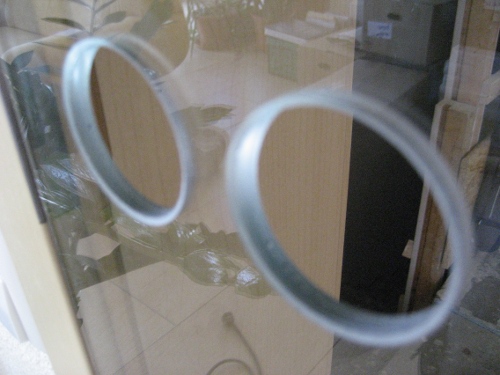
This was a surprise. We asked about the hardware for our glass door between our stairs and main floor. We wanted to be able to lock this door.
Aktiv Bausatzhaus Südbaden said to do this would be a large extra cost because of the drilling of a second hole. The handle we received is simple latch without a means to lock the door.
We are happy that some day when we want to lock this door we can change the closer hardware. The simple handle hardware does cover the second hole so we have used the handle. Questions do remain such as what is more costly, the door hardware or the extra hole?
 Pantry door is too Small, Or!
Your plan for the block work will give you the measurements for all door openings. We planned for two sliding doors and made the holes according to the plan. We were asked later if we wanted frames for these doors. We thought that we would finish the opening without a frame for the look we wanted. Here are some particulars to think about, that we didn't:
- I think of sliding doors as doors that slide into a wall. Naturaly unless you frame this wall with wood that is not possible with a solid wall.
- Due to having to clear your base trim, the door will hang at least 1 cm away from the wall.
- If you have made your opening, finished the wall and the door comes you could have a surprise. The door may not cover the complete opening as in our case.
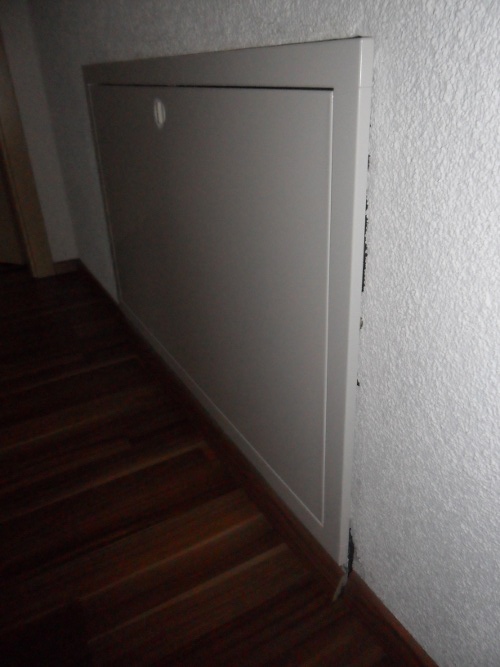 Just a little too thick for these walls
The Ytong block used for dividing walls without load have a thickness of 11.5 cm. The supplied box for the floor heating manifolds is about 1 cm to thick to hide in one of these walls if you use a very thin plaster coat. On the sheet metal back of the panel you will want to have room to screw a thin layer of drywall onto it. As I have now learned I would have been better off to make the side shown in this picture flat with the rough wall surface. On the backside of this wall I could have glued drywall against the complete wall. Yes, it would have worked but been a lot of extra work. Perhaps these boxes are made thinner. Check this detail before you end up trying to make the mistake look somehow not so bad.
January 1, 2012
 Railing choices
There are many choices and materials for your railings both inside and out. Talk to friends, look at other houses and take your time. Here are a few of the things we have learnt.
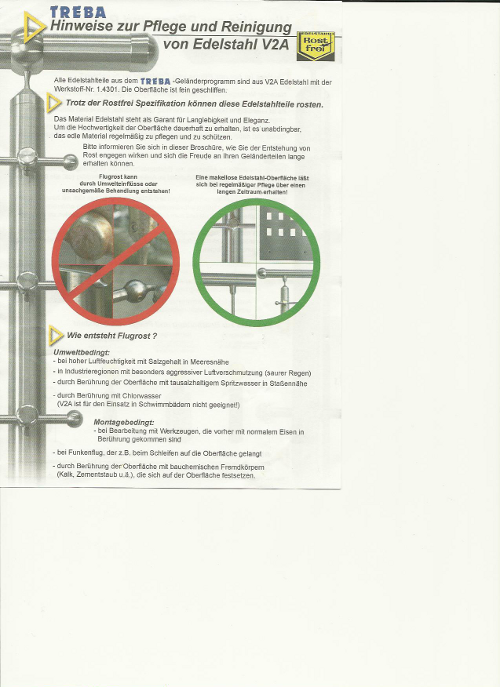
Stainless steel (V2A) rusts? We have had several talks over a longer time with Aktiv Bausatzhaus Südbaden GmbH about the discoloring of our railings. Jogi was surprised about the discoloring. We have still heard nothing but found our own information. V2A stainless steel does in fact rust. The web page at Treba/Frewa includes a page about the subject. We have concluded that our railings will not be a guaranty item and we can now choose to start cleaning them regularly or let them naturally discolor and rust until a time if/when we should decide to replace them. Note that the second circle in the original picture is green and states that if you use the proper protective products on your railings they will retain their appearance for many years.
Note a couple of things from the picture. The vertical and horizontal pipes are the same material. The caps for the horizontal pipe and rods give a finished look.
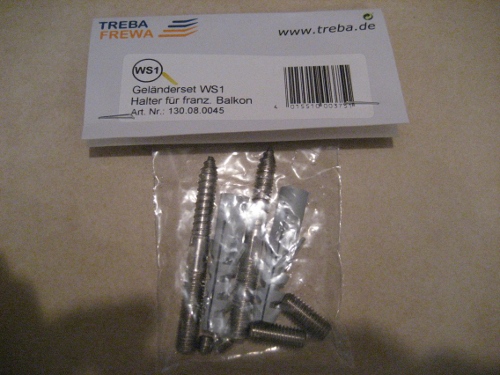 Wrong Anchors Delivered
Just because Aktiv Bausatzhaus Südbaden GmbH delivers your railings with only these anchors does not mean they are what you should use. In the case of railings I have picked up the proper Ytong block anchors and Fischer anchor glue. Drill your holes one after the other, gluing and setting the anchors at the same time. The glue will harden in the applicator fairly fast so you can't waste much time. Yes, that means you should locate and mark all holes before starting to drill and set the anchors.
 Sagging bars in Two Tone Optic
Unlike all of the pictures on the Treba web pages and other railings we have seen the materials we received included aluminum vertical pieces and stainless steel horizontal pieces. I had mounted the railings thinking we should just see how they looked before making our judgements. After mounting them the look is just not the look I would have choosen. After mounting materials delivered to you they cannot be returned. For whatever reason we were delivered two different material types for our railings. We hope that as the stainless steel discolors it will more closely match the color of the aluminum.
Another large consideration is the direction of the rods. On Treba's website the optic of horizontal bars can look more elegant than vertical bars. We chose this look but there are several considerations. Over longer spans the bars sag as in our application. The bars can also be used as a type of ladder or resting spot for persons feet. If you are one of my Canadian friends reading this you are very correct. The rules and regulations about railings in Germany are much more tolerant or relaxed as those in Canada.
Make yourself aware of your options and look at all delivered materials when delivered to avoid delays later when they don't happen to be the correct material. Retaining the elegant optic of our railings while stabilizing the bars appears to be our challenge for the future.
As of Jan. 2012 Jogi has reviewed our outside railing issue and has offered to financially help to correct the situation. Thanks Jogi.