 Talk to the Electrician
Please talk to the electrician responsible for your site! This is a typical method of installing your house's grounding system. The galvanized band lays within the reinforcing steel for the basement floor. Bands are taken out of the foundation hole up to points where they can be connected to the down pipes of the eves trough. Another short vertical piece will come up from the floor near the position of your main electrical panel.
Our band was positioned outside of the basement floor and was awkward to work around in a few places. Again, talk to your electrician about the pros and cons and what materials to use. As an interesting note I have checked many of the houses in our subdivision and it would appear that many have not connected the bands to their eves trough down pipe.
April 17, 2009
 EnbW hooks up Temporary Service
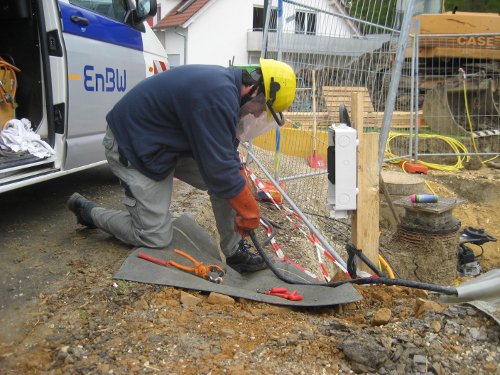
Our great neighbors supplied us with electricity to get started. Once Aktiv Bausatzhaus Südbaden supplied the temporary service the electrical utility (EnbW) was quickly on site to connect our temporary service.
You will have to supply a mounting place for the connection. The place will have to be within reach of the cable coming from the road. I used one of the stakes Aktiv supplied to work on the foundation and screwed a piece of board on to the stake so it would be wide enough. Remember that you may want to park on your site and many deliveries will follow so pick a good spot for the connection box.
 Tools for Electrical Work
In our contract we were given 12 weeks free rent of the needed tools for the electrical installation. Additional weeks would cost 50 Euros. When I asked for the tools I was told it was too early in the project to have them supplied.
When you are doing your block work much more than a mist of very light rain will cause the glue to become too wet and it will not stick to the wet blocks. If you have at least your main floor on you can start to rough in your electrical wiring. This is what I did rather than wasting time.
I purchased a heavy duty cutter for the hilti and a cheap two blade grinder. With our shop vacuum cleaner on the grinder I had our basement wiring almost finished and a part of the main floor before the block work was finished.
We never did see any tools from Aktiv Bausatzhaus Südbaden GmbH on our site for the electrical work. This was perhaps because we were already half way done the work before they were ready.
August 12, 2009
 Enlarging and making service holes
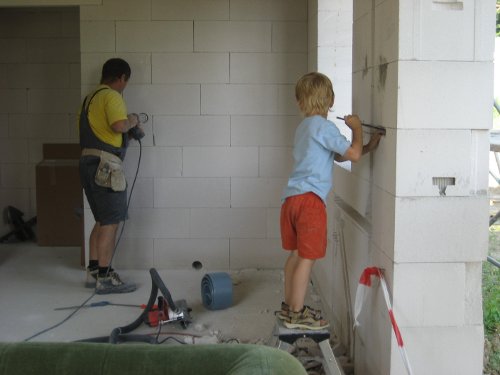
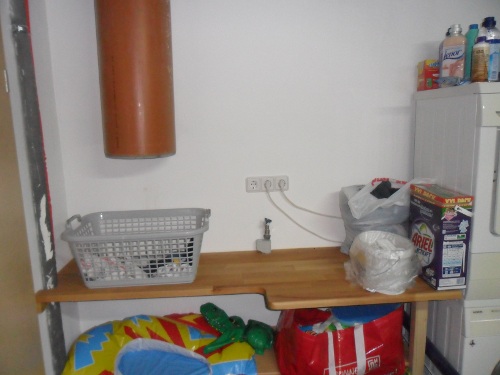
This point is not one to overlook. To supply your main floor and any others above that you need service holes. Through these holes plan for:
- 2 hot water lines (heat, hot water) with insulation making them close to 6 cms in diameter.
- 2 cold water lines (heat, cold water) with thin insulation making them close to 4 cms in diameter.
- if using a circulation pump one line with close to 5 cms diameter.
- most of the electrical wiring for your main and above floors will run through this hole. In the case of our house this makes for a bundle of wires approximately 10 cms in diameter.
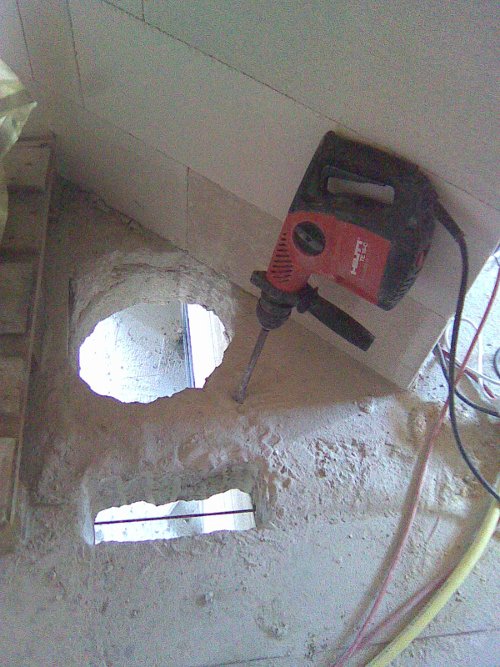 Hilti again to the Rescue
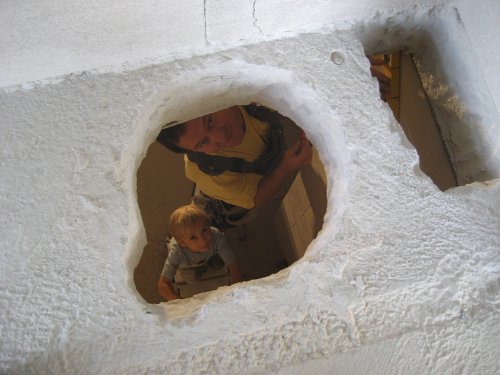
You may be wondering what the two holes are for. The round one is for a laundry chute. (We love our laundry chute.) Who knows where the communication or decision process went wrong here but be aware. We used a 30cm drainage pipe for this. Gotcha, a drainage pipe is 30cm on the inside. Next time I would have the hole prepared with a diameter of 33-34cm.
The rectangular hole is for our wiring and plumbing needs. Since we had to make our own I chose a location at the back side of a shoe cupboard to hide the cables and wires running from the basement to the upper floor. These two holes in our main and upper floor took more than just a couple hours to finish so our tip, plan for them in your concrete slab design.
The hole is fairly long because a third party plumbing contractor suggested laying the pipes out side by side on a proper support bracket. I chose later to cram everything into the back of the hole leaving almost enough room in the shoe cupboard for my shoes as well. Our access remains good and we cross our fingers that we will not have to reopen this area for many years to come.
 Services Entrance Point, Old Style
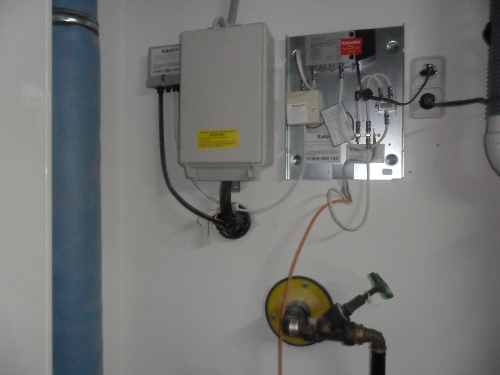
This was a topic of frustration but didn't really need to be. As you can see the water line and cables enter through our basement wall separately. On our wall we have lots of room and it is just fine like this. If your situation is that you have little room on your wall and would like everything to come through the wall with a fitting about the size of our water pipe fitting then read on.
As I watched the two gentlemen from the company contracted to install the services cables and pipe things became apparent. They had a mid to large size Hilti and had to drill through our almost 40cm basement wall. Ouch and ouch again. The drill will cant and stick/jam often in the hole. These two holes are much smaller than the hole needed for the new style multi-function entrance point. A special drilling machine is needed for large holes in this block. When I asked for such a machine at the rental shop for my kitchen's exhaust fan I learnt more.
The big drilling machine must be mechanically fixed to the wall. You have no chance to hold it! Fixing the machine to Ytong block must be done in the correct way or it will tear itself from the wall. I did many small holes with my own Hilti and avoided the issue.
If you want to have the new style entrance point get someone to supply you with the bushing and appropriate location. You can easily cement the bushing into your wall as you lay the block and everybody will be happy. Otherwise, you will hear often, "Yes it is possible." "No, not possible" and getting the persons involved to play together may be frustrating.
September 11, 2009
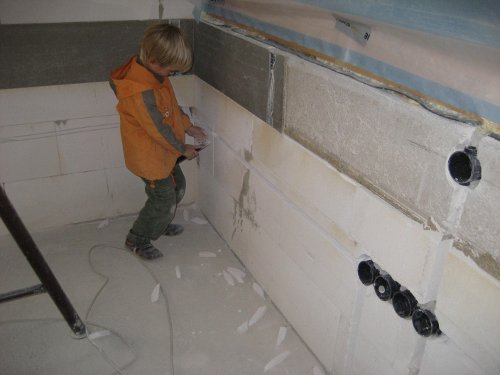 Jascha goes Horizontal
We had originally planned to run our wiring mainly across the floor. Perhaps if at a later date you should chose to remove a wall or cut a hole into a wall this may have a benifit. We changed our plan and decided to run most all of our wires in the walls horizontally between receptacles. Jogi or the electrician will be happy that you have used less wire and when it comes time to prepare the floors for estrich, you will not have to cut around all the wires saving you a fair bit of time. Jascha will tell you that cleaning the horizontal grooves is not much more time consuming than going vertical.
November 30, 2009
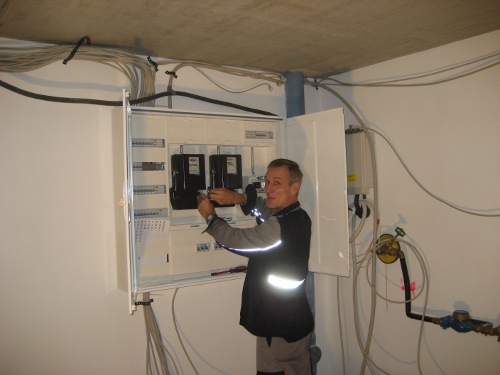 ENBW friendly and prompt
The electric utility, EnbW, fit into our planning perfectly. They were on site as soon as we needed them and all their workers were amoung the most pleasant fellows we met.
In this picture our meters are being installed so the electrician can complete his work on our main panel.
December 12, 2009
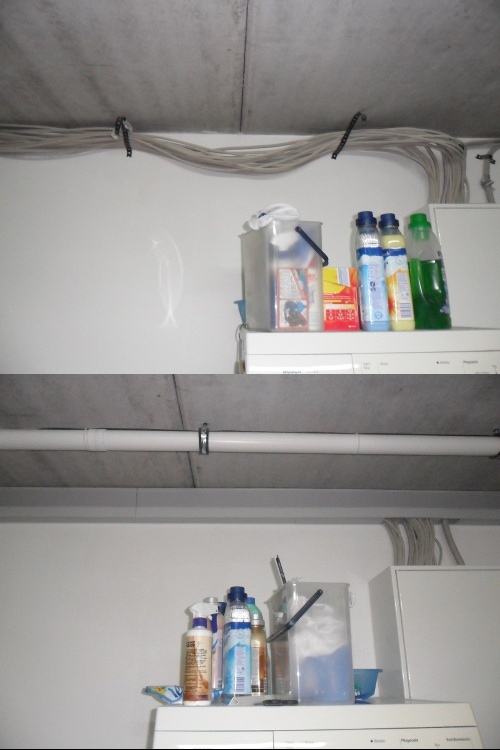 Wiring at Panel Before and After
Here we have the before and after but why work against yourself? The cable conduit was not supplied to us from Aktiv Bausatzhaus Südbaden GmbH. We did this later when tidying up this room but this is not time efficient.
If I was doing this again I would install the cable conduit at the start of my wiring job. It is easy to lay the successive cables into the conduit and everything is the first time finished. At the panel you may have to support the wire bundle from the ceiling. When the electrician connects your wires to the panel you are finished.
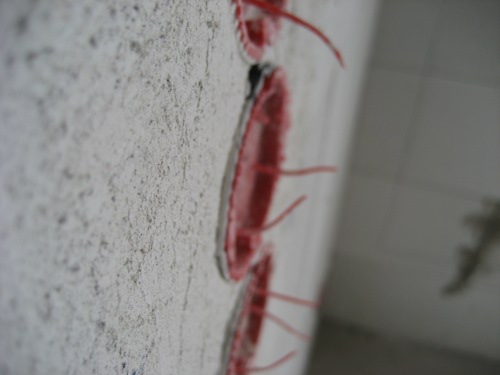
Cables coming from the basement may come to your panel from the floor. These can be hidden in the wall if you make a large enough groove and plaster them in there once the connections are made. This makes for a nice looking job.
 Talk to the Electrician
You could avoid more work and unfortunate layout problems if you take some time doing your planning with the electrician. In the case of a washing machine the water is not considered an open source. Therefore you can put the machine alongside of your main panel. Had I known this our receptacles and water connections would have been in behind the machines.
 Big difference between Countries
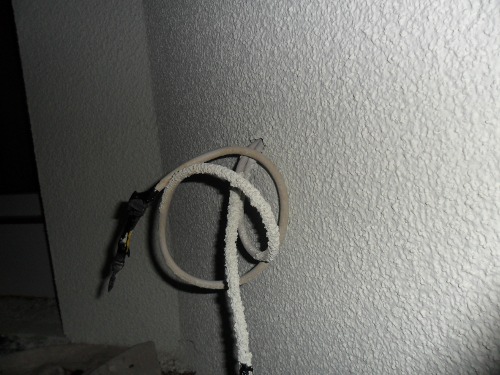
Well just don't do this in Germany. I left the outside wiring for a later date. Considering I thought I would have to use a sealed outdoor box this would have been Okay. Here in Germany you will use a normal box that is cemented into the wall just the same as indoor boxes. An extra plastic piece is used as a seal/whatever to protect against water entering the box. I am sceptical as to the whole issue but will try it out as suggested.
Why should you not leave the wire out? Our plaster is now finished and I will have to carefully chisel the hole out and set the boxes taking me much more time than if I had set the boxes at the time I was running the wires. Live and learn!
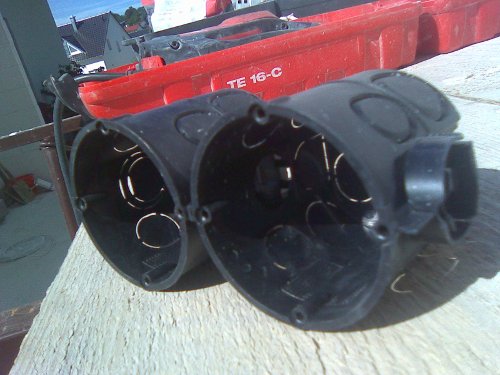 Notice the 4 Screw Positions
When we were delivered the materials for our wiring I asked the young worker about screws for mounting the receptacles. He said that screws were not necessary as the receptacles are held in place with claws. I had made a good start on the wiring before learning some things I'd like to pass on.
Not all boxes are made the same. These in the picture have 4 screw locations. The ones I was delivered had only 2. Dependent on which orientation and which type of receptacle you are mounting the 2 extra screw locations can save your day. I look for this feature now and buy only this type.
Why screws? Because sometimes the receptacle does not have claws. Sometimes the claws will not hold well enough and sometimes the claws get in the way.
 Just too Shallow!
Another of those live and learn situations. If you are doing a thin plaster finish on your walls recess the electrical boxes a little. In several places the boxes got really crowded and to make room I chiselled out the back side of the box. If doing the work again I would use only the deeper style of boxes. If at some point you would like to change some wiring or add a wire into the box you will really appreciate the extra room.
Even on outside walls the use of the deeper boxes (6cm) will not significantly compromise the insulating value. The boxes cost very little more and installing them in Ytong walls is very easy. Drill your holes first, grind and clear the grooves, pack enough MP75 plaster into the hole to fill the excess room and shove the box in place. Fill in any sides that did not have enough plaster and voila, done!
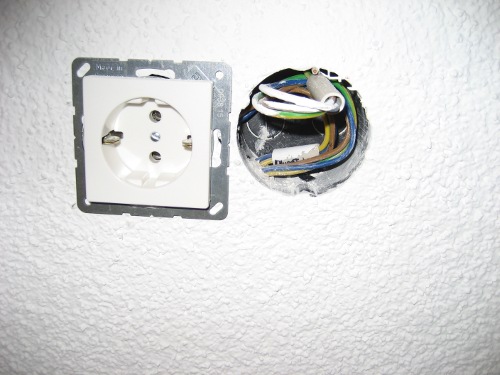 Vertical or Horizontal?
This issue is much like in Canada. Some suggest ground pin up to protect a child with a thin metal object and some suggest down so the ground is the last connection to break should the plug fall out.
Here in Germany I had thought all receptacles were mounted with the power pins horizontally. In this picture they are vertical. Why, you might ask. In this situation the normally used claws are also vertical. If you turn them horizontally the claws will be dangerously close to the wires running between the boxes. If you like the horizontal position simply use the mounting screw locations to hold the receptacle. I have even gone to the effort of removing the inside claw from the left and right receptacle. The outside claws can be gently tightened to provide a little extra support if you have used only 2 screws.
My rule of thumb is now in any group of receptacles that numbers 4 or more to turn at least every other inside receptacle vertical. Horizontal remains my preferred orientation because of the many plugs that are bent at 90 degrees.
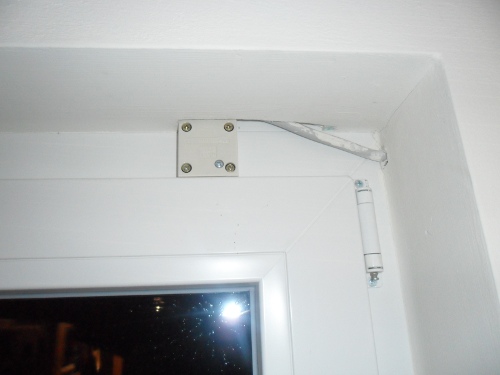 Fan Switch on Pantry Window
This was something new for me. In order to operate an exhaust fan in your kitchen when you have a wood stove, the kitchen window must be open! Yes, electrically switched by opening the window. I mean the physics is not too hard to understand if your house is perfectly sealed by why the kitchen. Cook something for a long time on your stove and at -15 degrees outside temperature your taps freeze. Well maybe not but a cold draft for sure just at the time you are working in the kitchen.
With a short discussion with the person that will check your wood stove installation it was agreed that we could use the pantry window as long as the room had ventilation. I ran a wire from this window to the receptacle where I would be taking power to the fan and for less than 10 Euros our switching circuit is finished.
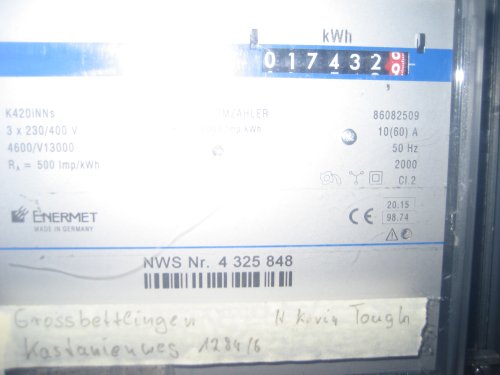 Where did it Go!
I don't know why I thought enough to take this picture, perhaps deja vu. This is a picture of the temporary electrical service meter reading after we were finished with it. The meter was taken back in the temporary service panel by a worker of the electrician.
We were visited more than once many months later by the electrical utility. They wanted to read the meter. Yes, the meter was lost or misplaced. It took some time before the meter was found and our billing was corrected. As a tip, take a picture/reading of your meter before you start using it and after you are finished with it. In some cases you or the next persons may use a considerable amount of power so take the tip.
Conclusions
 Try to get these supplied
Other than plastering one box completely full and tempoarily losing it, our electrical work went well. I did the layout of individual circuits myself so I can't tell you how good or bad the advice, plans and directions from the electrican we had was. We hope these several hints and tips help you to complete or plan your job well.