 Finding cables and waterline
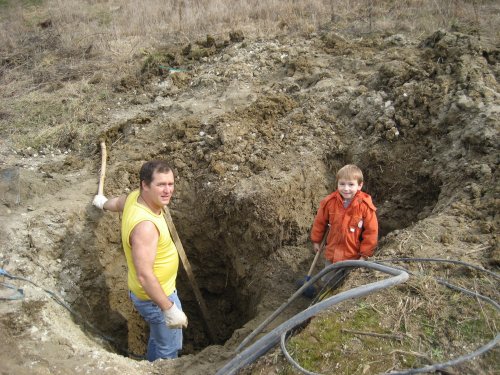
Well here we are. The first day working at our lot. We thought we would get a jump on the excavator and find our cables and waterline. We were successful at about 6 feet for the water. As we found the waterline we also found water. It now remains to be seen what kind of complications this may bring us.
 Ground water the next day
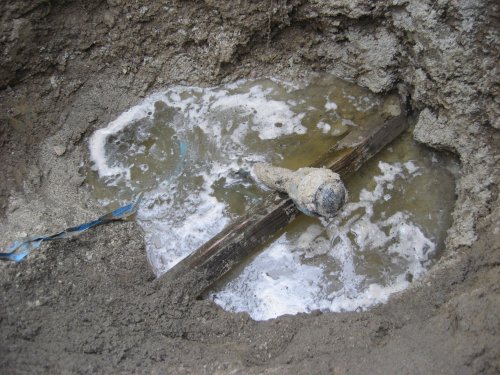
Here is the level of our water the day after. I have become nervous because our neighbors have told us that their building company would not consider putting a basement in because of the poor and wet ground conditions. 2 houses down the gentle slope from us is a house with full basement and significantly lower than our lot. As I relate the findings to Jogi we agree this cannot be the water table and we should proceed as planned.
As we start the real digging we learn the earth here has a lot of clay in it and water does not filter through it very well. All service pipes and cables to lots are filled in around the pipes and cables with a fine gray sand. Water travels through this sand very easily. At almost all construction sites in our subdivision water will be present as the water pipe is found. This is ground water trying to find its way back to the water table or nearest creek or river.
April 25, 2009
 Checking Corner Levels First
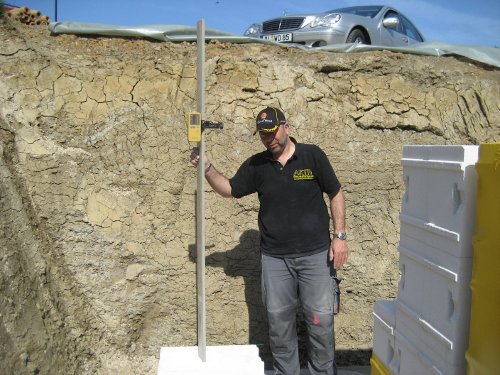
Before you start laying block take a few minutes to check the heights of the slab. Check the heights in all corners to see if you may need to build any up to match the others. In a low corner you will simply put more morter under the first layer of block and bring the corner up. Once you have checked the corners, check for higher spots between the corners. If you find higher spots between the corners that you can not fix by using a thinner mortar joint then you will likely want to increase the heights of your corners. If the high spot is a sharp point or short distance you can file the bottom side of a few blocks.
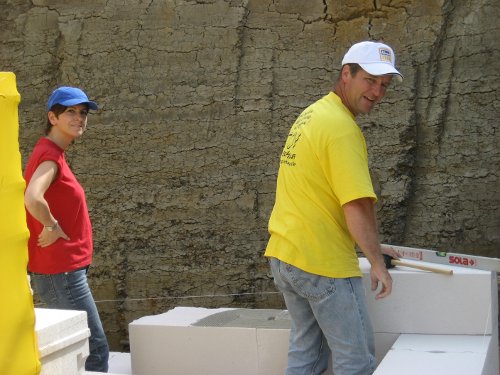
 First Row Help
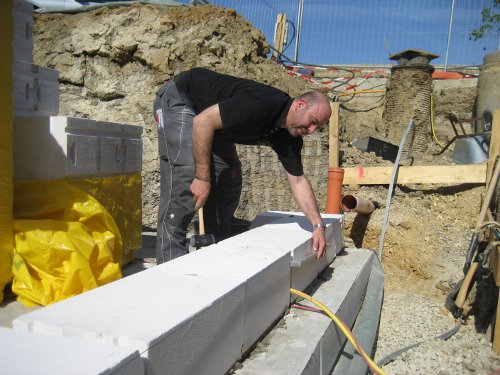
This first row of block is like laying standard blocks as one might be used to in Canada. The row is laid as close as possible to level. Aktiv Bausatzhaus Südbaden GmbH offers their customers the help of a professional to lay this row. Between the slab and block row one shape or form of moisture barrier will be used to keep moisture out of the wall.
The professional person will guide you and give tips on working with Ytong blocks. I found in comparison with block work I have done in Canada the Ytong blocks to be great to work with.
I have often wondered why I haven't yet seen them used in Canada. It could be cost, problems with electrical code or whatever. Too bad.
 Build Your Corners First
I have always found it best to build your corners first. Using a long level on the corner for checking your vertical position and a shorter level to check that the block is laying level is relatively simple. The Ytong glue used to glue the blocks does not allow you to tilt the block much but small adjustments are possible with a heavy rubber hammer. I very quickly replaced the hammer that Aktiv supplied with a heavier one.
There is a certain tolerance to the width of the block. Since you will be applying a sealant to the outside of the block without parging, try to keep the outside surface of the wall relatively flat. On any walls above the ground height keep the inside surface flat. This will help you out most should you decide to do your own inside thin plaster.
Laying the block for your house is one of the most rewarding phases of the building process. Even if you have two left hands Ytong makes this something you really should try. You will eventually need some scaffolding and stands which most rental places will have.
May 8, 2009
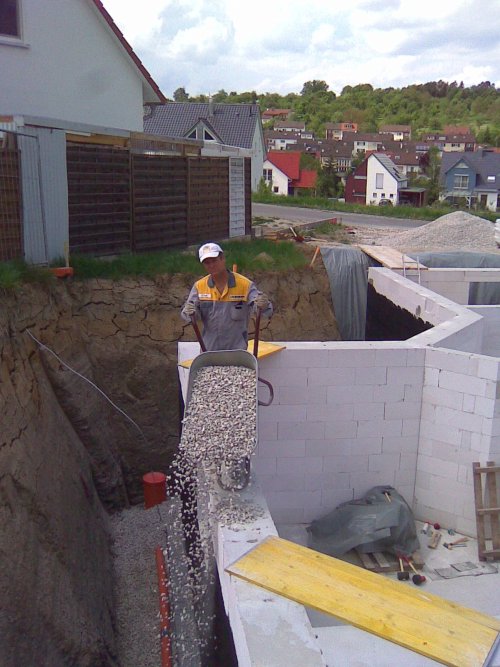 Drainage stone over "Big O"
A block wall with Ytong blocks is not problem at all as long as there is no constant water pressure against the wall. "Big O" pipe comes here in short lengths. Lay the pipes alongside your footings or slab and secure them well enough that when you dump the stone from the wall above they will remain in the proper spot. From our wheelbarrow I dumped 20 tons of stone around the slab. We will not have future problems with water.
Here in Germany they use a felt cloth that should be put under the "Big O" and then wrapped around the pipe while adding stone. ("Big O" with a sock around it would be a good product to import to Germany.) I will use the felt cloth on top of the stone to keep the fine material from the back filling material from mixing with the stone.
May 13, 2009
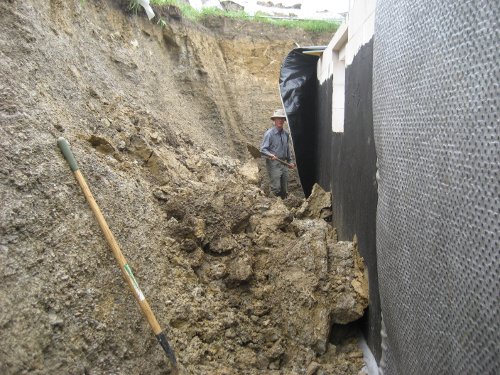 All The Way From Canada for This!
Just arrived from Canada for our Landslide. Yes, it doesn't look like much but this is wet heavy clay filled earth. The day before we had such a heavy rain that our neighbours said it was the heaviest rain they had ever seen.
Not many contractors go to the work to lay plastic out to protect their foundation holes but it might be worth the thought. In our case even with the plastic mother nature gave us a little surprise. The water got in underneath the plastic and caused a part of the bank to fall in.
In the picture above you can see some of the plastic we used. In that area against the road we did not have any problems even with the heavy rain.
May 20, 2009
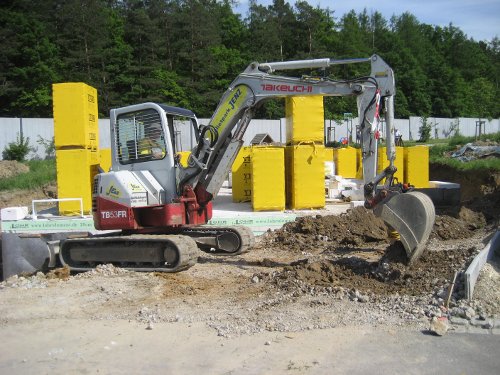 Filling In Around Basement
Many people were surprised to see our basement made with block. Most here are pre-fabricated slab sections, poured cement or a combination of the two. Ytong block is in my opinion a super solution for builders without cranes on site and/or limited manpower. A sealant will protect the block from water and as a second barrier Aktiv Bausatzhaus Südbaden GmbH supplies, drainage foil/plastic.
As you fill in it is important to wait until your ground level floor is solid. Then in the areas you will compact do this in thin layers. Most compaction machines for such use are not effective with material depths of over 20 or so centimeters.
With heavy compactors, excavators or bulldozers travelling on loose fill you can exert large pressures on basement walls. Be careful and get some on-site advice if you are not sure about what you should do.
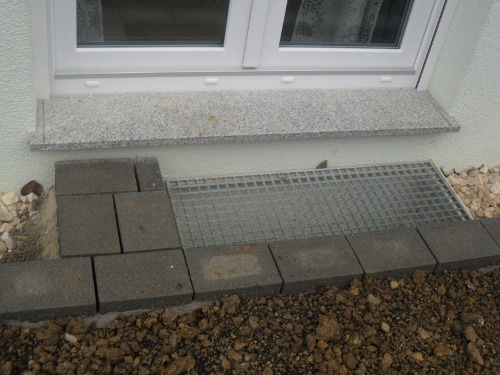 Positioning your Window Wells
On my framing page I have discussed several problems you could have with window wells. As you start to fill in around your house there are many things to consider. One major point is that of ground water. If the finished ground is soaked and heavy rains occur water can flow over the top of the ground and dependent on slope flow towards or against your house. I spoke with several individuals as well as with Aktiv Bausatzhaus Südbaden GmbH. I decided to mount my window wells at slightly under the height of the top of our structural cement floor of the ground level of our house. This would eliminate any possibility of water entering our house between the various layers of materials used in our ground floor.
As seen in this picture when 16 cms of flooring materials are added to the structural floor the resulting step out onto the window well grate is more than enough. Stepping out onto the paving stone I have set late in 2011 is much more comfortable.
The natural groung height behind our house increases significantly to a walking path. As we started to consider our gardening options in 2011 we soon realized that we will end up moving the heights of our window well grates at least 12 cm higher. For a couple of reasons the threat of water entering our house is almost zero:
- To protect the outside plaster from dirty water splashing from rain hitting the ground, most walls are protected by a band of crushed stone along the walls. This stone is normally well drained into the foundation of the house.
- As well the outside plaster on the lower section of your house should be cement based. This allows it to stand frequently being wet and acts as a significant barrier to water.
For these reasons I have no worries now about raising the height of our garden/lawn above that of the structural floor height of our ground floor. I will have to add a small frame on top of our window wells and bring the grates up to match the new height.
Conclusions
 Very Comfortable Living Space
Many German houses are built without basements. Often if the house has a basement the rooms are often not used as living space. This is odd for a person like myself that prefers to have his bedroom in the basement. In a Ytong block basement I find the conditions even better. Warm enough in winter and cool enough in summer.
Check out our costs page for some more particulars on the costs of doing your basement. We were over budget by a significant amount. Jogi took some information from us but has never gotten back to us about the issue.
If you deal with Jogi fix a price and know what is included. Does the stone come from the contractor doing the digging? Steel for the floor, how much, what costs? Can you dig plumbing lines in by hand or will you need a small excavator in the hole? I have heard you may be able to get a price per square meter. Are all materials included? Be aware and ask questions. You may even want to see if you can get a price from a contractor to finish the floor for you and compare.